(Update 9/7/12: You might want checkout the Presenter Touch Wall, a 65″ multitouch wall built for public spaces.)
This will be the last installment of this series on our multitouch wall project here at the Ideum studio. Next month, we’ll be able to show you the exhibit installed. For the last two weeks we’ve been working on blending the two high-resolution images and the infrared illumination and tracking. Also, yesterday we began to pack up the pieces for shipping.
Blending the two high-resolution projectors has taken a bit of time. The two projectors are dVision 35 WQXGA XB LED projectors by Digital Projection. The blending hardware is also from Digital Projection. The combined resolution of our round, 7 foot projected images is 2560 x 2560. Before settling on a hardware solution, we tried a few different blending methods using software. One of the software methods we first explored, used corners of the two projected images to calibrate. Sort of a non-starter when your image is round! The blending hardware we are using is Digital Projection’s Fusion 3D hardware.
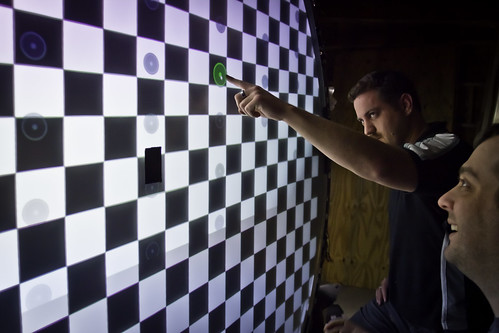
In the photograph above you can see one of the calibration tests. Paul Lacey (Senior Multitouch Engineer at Ideum) and Chris Steinmetz (Support Specialist at Ideum) are examining a test blend.
Infrared Illumination and tracking was another major challenge. As we mentioned in our last blog post (See Part 3), we’re using low-powered lasers for illumination. For tracking we are using NUITEQ’s SnowFlake Software. The software will use the four cameras (See Part 2) to track the IR touch points on the wall’s surface. The IR cameras we are using are from Point Grey.
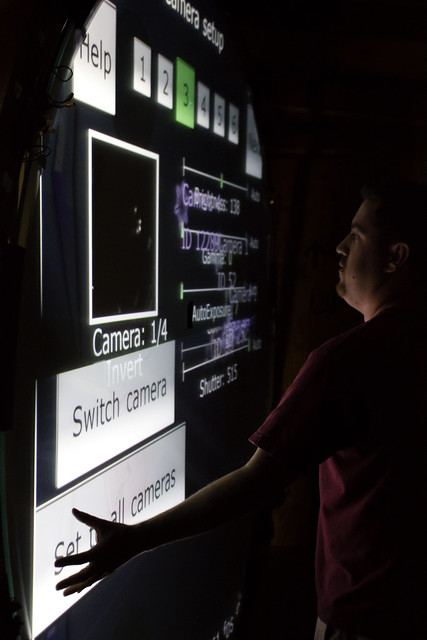
The photograph above shows a calibration test using Snowflake software which works with Point Grey cameras and supports four camera input.
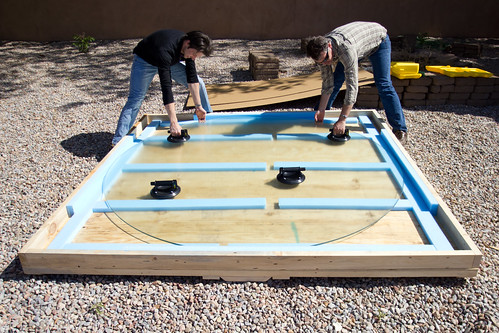
Finally, packing up all of these materials for shipment is a major task in itself. Many of the items are extremely fragile, such as the 7 foot acrylic projection screen. Others, like the large ring are just hard to handle and move.
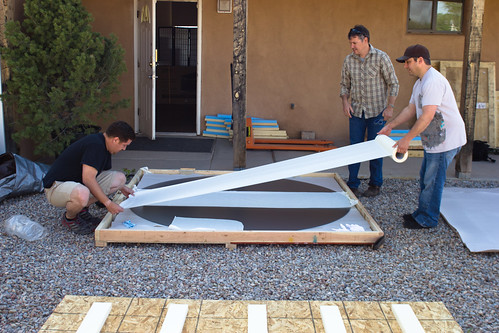
The round acrylic projection surface needed to be wrapped very carefully for transport.
The 10mm haptic glass is both fragile (when not mounted) and heavy.

The ring itself is several hundred pounds. Here we are preparing it to be moved.
In the next post, we’ll show you the installation! Also, we’ll finally be able to share the name of the aquarium that has partnered with us to develop the exhibit. (They gave permission to share the progress, but wanted their name kept private until the exhibition opens.) To see the previous steps in the process check out: Building a High-Resolution Multitouch Wall Part 1, Part 2 and Part 3.
Recent Posts

Building an Interactive Video Wall
Our most ambitious technical project of 2016 was the DinoStomp 3D interactive video wall that we developed with the Fort Worth Museum of Science and History. The DinoStomp exhibit consists of a video wall 8’ high and…


Bluebeam Revu on Ideum Drafting Multitouch Tables
Increasingly, new applications designed specifically for large touch displays are becoming available. This is the second in our series of videos showing software packages that work great with our hardware. This time we focus on Bluebeam Revu, a…


Redesigned Touch Tables & Displays in 2016
Our goals for 2016 were simple: incorporate new touch technology, provide more choices for our hardware customers, and improve our entire line of multitouch tables and touch walls. As with most creative endeavors,…
